Web Fonts
Web fonts are files that have to be downloaded to the user’s browser, so try to limit how many different fonts are used in a design. For each font face, there can be up to 4 separate files that are required for support in all browsers. If the bold and italic versions of a typeface are used only once or twice in a design, it may make more sense to allow the browser to create the bold or italic versions. Desktop software used to do this, applying a faux-bold or faux-italic style to a font.
Resource does not recommend using subscription font services where the fonts are hosted by a third party, as these offerings usually charge a yearly fee for an entire library and it is difficult to track costs. Instead, self-hosted fonts are preferable. These fonts can either be purchased directly from the vendor or from a service such as myfonts.com. Legally, fonts need to be purchased per client / per project.
Free Google fonts are also a good alternative to purchasing fonts.
Creating Webfont Kits
Using the myfonts.com Webfont Kit builder:
- Name – website domain name.
- Select necessary fonts – remember to use the bare minimum as each fontface is more overhead for the user’s browser.
- Include Font Formats – select only WOFF2.
- Data URI Encoding – do not select.
- Hinting – Best; do not select ‘Also include unhinted webfonts for browsers that don’t use hints.’
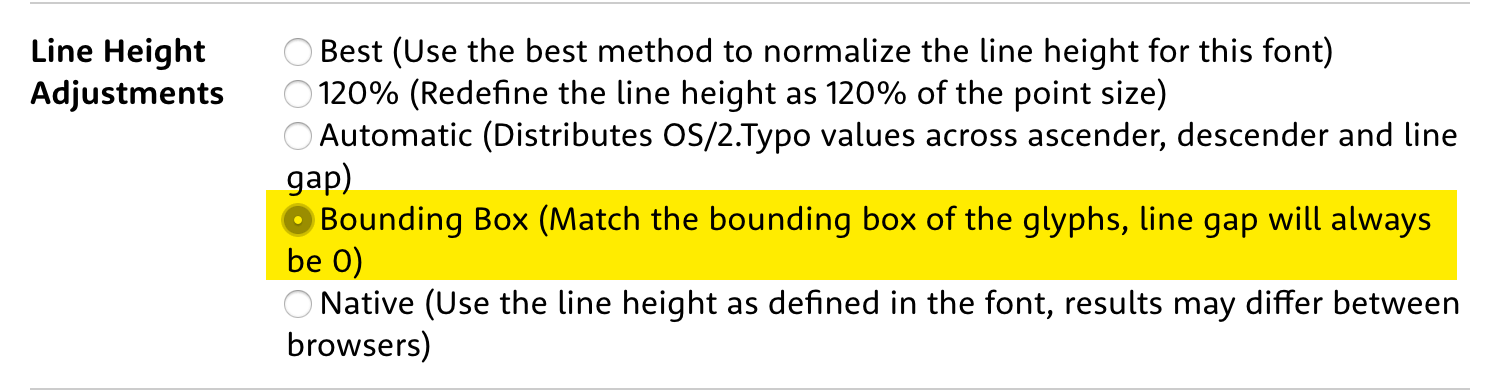
- Line Height Adjustments – IMPORTANT: using Bounding Box line height will ensure that the y-padding between font types is the exact same (for example using IE or Edge and text on styled buttons).
- WordPress – do not select ‘Make this a WordPress webfonts kit.’
- Browser Code – CSS (simple and clean)
Export your Webfont Kit and save it in the Programming directory of the job.